Pages

Showing posts with label household recipes. Show all posts

Tuesday, February 7, 2012

Alternate Uses For Plain White Sugar

Bookmark and Share
I ran across these uses for plain white sugar in the latest issue of Cook’s Illustrated magazine (which I really love because it delves deep into the how and why of cooking food – almost like a science lesson in the kitchen!). In addition to the facial scrub recipe I shared with you (which actually uses brown sugar), these are great ways to use a common household item to solve a common household problem!

As an extra bonus, do you know how to keep or make brown sugar soft again? You can either store it in a terra cotta container, add an apple slice to the bag, simply microwave it for about 30 seconds, or bake on a sheet in the oven at 250 degrees for a few minutes. Any or all of these methods work nicely.

Keep Cookies Soft

Sugar absorbs moisture, so adding several cubes of sugar (or a little pill bottle filled with sugar to your cookie jar will keep them moist, soft and chewy. This is perfect for cookies like snicker doodles or chewy chocolate chip.

Make Your Hands Smell Good

After you’ve chopped pungent ingredients such as onions or garlic, scrub your moistened hands with a bit of sugar. You may have to leave the sugar on your hands for a minute or two in order to totally get rid of the smell.

Relieve Burns

We’ve all burned our tongues on a hot food or liquid before; next time try placing your tongue on a spoonful of sugar. When the sugar crystals hit your tongue, they will begin to dissolve right away and pull out the heat.

Wednesday, October 26, 2011

October 26, 2011: Extreme Couponing Recipe


Bookmark and Share
Well, I’ve decided to try my hand at extreme couponing. I’ve seen the show on TV, I’ve read articles in the newspaper about couponers who save 75% or more on their grocery store bills, and it’s something that intrigues me. All you need is lots of coupons and the time to go through sale papers to match deals with coupons.

Now that we have subscribed to the Arizona Republic from Phoenix as well as our own little local paper, I get two copies of some coupons delivered to me. That’s a good start, but I also go online to four sites and print what I can there: Safeway.com, Bashas.com, coupons.com, and shortcuts.com.

The other part of the extreme couponing recipe is matching current deals with the coupons you have. For me, that means looking through the sale papers for Safeway, Basha’s, Walgreens, and CVS. That’s pretty much it as far as the local stores that accept coupons. If an item is on sale for a good price and I have a coupon for that item, it gets added to my list.

Now, here’s the tips and tricks I’ve learned:

*Wednesday is the day that all the sales start so I use Wednesday morning for finding new coupons online and going through sale papers. Since I don’t get the sale paper for Safeway until Friday, I stop by right after my morning walk in the park and grab one from inside the store.

*If you have a Safeway in your area, sign up for an online account so you can find extra specials only listed online and download electronic coupons straight to your Club card.

*Cut out and organize printed coupons as soon as you get them. I do this on Sunday afternoons, after church, so they’re ready to go for my Wednesday and Friday shopping trips.

*You may have seen lots of extreme couponers getting products for free. This is really difficult to do; it usually requires that you find an item on sale for $1 or less (most stores won’t double coupons to more than $1 total value) and have a coupon that adds up to $1 or more.

*If you want to get the most valuable coupons, worth more than $1 or for free items, you need to join an online “premium” coupon site. Yes, that costs money, but it might be worth it, particularly if the subscription price is very reasonable.

Those are the basics. The longer you do this, the more coupons you will accumulate and the better your chances of finding killer deals at the store.

If you’re wondering how I’m doing, so far the most I’ve saved is about 60%. But all that is going to change this Friday when I head over to Safeway. They’ve got big packages of frozen fish on a BOGO (buy one, get one free) sale and I’ve got two coupons for free products. If everything goes according to plan, I’ll get over $50 worth of frozen fish for FREE! Now that’s what I’m talking about… I am now an extreme coupon fanatic and I look forward to the thrill of the hunt. Stay tuned and I’ll post more money saving shopping tips in the future.

Friday, September 9, 2011

September 9, 2011: Nonstick Kitchen Tips


Bookmark and Share
After I wrote the first post about miscellaneous tips while working in the kitchen, I got to thinking about a lot more that I’ve used over the years and thought you might find useful. Here’s a list of ways to keep your food from sticking.

Nonstick Frying

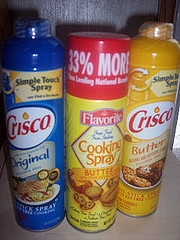
Love cooking over easy eggs but hate using nonstick cookware like I do? My stainless steel and cast iron cookware becomes virtually nonstick when I simply spray it with cooking spray, such as Pam, before adding oil and food.

Nonstick Measuring

If you’re making a recipe that calls for a gooey ingredient, like honey, and oil always measure out the oil first. The oil will coat the measuring spoon or cup and allow your gooey ingredient to slide right off!

Nonstick Covers

Anytime you have to cover a cheese-topped casserole dish or freshly frosted cake with aluminum foil, spritz it with cooking spray first. The cheese or frosting won’t stick to it.

Peanut Butter Recipes

Just like the nonstick measuring tip, when you're making peanut butter cookies or a recipe like my Thai peanut sauce recipe, if you spray your measuring utensils with Pam first, you'll have a much easier job of cleaning up afterward!

Sunday, August 28, 2011

August 28,2011: Wooden Spoons – Great Kitchen Helpers


Bookmark and Share
We were invited to a barbecue last night at a friend’s house. His sister, a real Georgia peach, was visiting and we got to meet her. She still retains her lovely Southern accent and while we were talking about Southern style food, she mentioned to me how many ways she uses a wooden spoon in the kitchen. I thought I’d share her tips with you!

When boiling foods like pasta or potatoes, lay the spoon across the top of the pot and it won’t boil over.

Test the heat of oil to see if it’s ready for frying food by placing the handle end of the spoon into the oil. If the oil bubbles around the spoon handle, it’s hot enough for frying!

Why use a wooden spoon when stirring a sauce on top of the sauce? Particularly if the recipe requires a long cooking time, a wooden spoon is ideal because the handle won’t get hot. Plus, it won’t scratch or otherwise damage your pots and pans.

When stirring any type of acid, citric or otherwise, into a recipe, a metal spoon can react and leave behind a metallic taste (the same reason you never marinate foods in a metal bowl). Use wood for the best results.

As I shared with you in my recipe for goat’s milk cheese, a wooden spoon is perfect to use for tying up your bundle of cheese cloth and allowing the whey to drip out. Along those same lines, a wooden spoon is a great tool for dipping a wick into wax when you make your own taper candles.

I’ve only got one caution to share when using wooden spoons in the kitchen – don’t use them for raw meats, especially chicken. It’s too difficult to completely sanitize them and you could run the risk of retaining dangerous bacteria in the spoon.

Wednesday, August 24, 2011

August 24, 2011: Miscellaneous Kitchen Tips


Bookmark and Share
Every now and then I run across a good idea that isn’t enough to make a recipe out of, yet it’s something I want to share with you. So I’ve compiled this short list of kitchen helps that I hope you’ll find worthwhile. As I come across more, I’ll share them in a future list.

Peeling Tomatoes

How often do you run across a recipe that calls for peeled tomatoes? There’s one I made for my mother-in-law last year that she particularly enjoyed for a corn tomato pie (kind of like a Bisquick impossible pie), yet it would have been much more tasty had the tomatoes been peeled of their tough skin. Usually this is a real chore, but not if you follow this recipe, which will come in handy as you harvest your bounty of garden tomatoes:

Cut an X in the bottom of each tomato. Line a baking sheet with parchment paper and place the tomatoes, X side up, on the paper. Roast in a 375 degree oven for about 30 minutes, or until the skin starts to peel away from the Xes. Remove from the oven. When cool enough to handle, simply peel off the skin and core, if necessary. Voila! Easy peeling and much more efficient than blanching them in boiling water!

Draining Hamburger Meat

In all my years of cooking hamburger meat, I’ve yet to find an easy to drain the grease, other than using a colander (which doesn’t work too well since the holes are usually too big), until now. Use a splatter screen with a knob in the center. Place it over your pan, tilt the pan and screen, and let the grease pour through the screen holes into a container.

I cook hamburger in my cast iron skillet for the best browning and it’s heavy, especially for my wrists with arthritis and carpal tunnel syndrome, but this was a breeze as far as draining it!

Creamed Corn

Wish to make a recipe calling for creamed corn (such as my Southwestern Cornbread recipe) but all you’ve got is a regular can of corn? Just pour the can, water and all, into your blender or food processor. Add a half teaspoon of sugar and pulse a few seconds.

Friday, June 24, 2011

June 24, 2011: Organic Garden Bug Repellant Recipe

Bookmark and Share

My vegetable garden is rather haphazard this year; that’s due to not getting the soil in my regular garden plot properly prepared. Instead, I decided to plant my peat pots of fledgling veggies started from seed all over the yard – I’ve got some in the front flower bed, some in the back yard flower bed, some still in pots. It may not be a very organized way to plant a garden, but so far it’s working!

The only problem is an abundance of pests who hop all over the plant leaves and much away, creating holes and stunting the growth of my vegetables. I did some research in a couple of my organic gardening books and found out that bugs usually don’t like anything smelly or spicy hot. So… this is the formulation I came up with to defend against hungry bugs.

Organic Garden Bug Repellant Spray

3 cloves garlic, crushed
1 T. dried minced onion
¼ cup dried red chile powder (can substitute dried red chile pods)
½ cup plain vinegar
½ cup hot water

Combine all ingredients in a jar and let sit overnight. The next morning, strain the mixture into a spray bottle. Spray on plant leaves, being sure not to forget the undersides.

So far so good - the only downside is that every time I use it, I crave red chile enchiladas. *sigh* I’ll let you know at summer’s end whether it worked to keep the pesky pests away from my precious veggies!

Sunday, February 20, 2011

February 20, 2011: Recipes for Using Candles

Bookmark and Share

Continuing with the theme of a romantic February, I thought it would be appropriate to talk about candles. Most of us use them – I know I light at least one candle a day to add subtle scent to my house. I received the most wonderful candle for Christmas from my son and daughter-in-law last year. It's an expensive one from Bath & Bodyworks, made by Slatkin & Co., mint chocolate scented. I burned it daily for a while but then stopped because I didn't want it to end! It is the most luscious smell - you can just imagine eating a rich, decadent, chocolate-covered mint candy while it's burning. It's an incredibly realistic scent!

But I digress... Most of us, I would imagine, opt for the cheaper candles we aren't afraid to burn often. But even those can end up costing quite a bit if you're an avid candle burner.

Here, then, are some tips to make your candles last longer, stay fresh, and safely light them and extinguish them.

• Store your candles in the freezer when not using. They should last longer and drip less when you light them.
• Use plain rubbing alcohol to clean the outside surface.
• To repair a small break in a votive or taper, take the two pieces and run them under very hot water (you can also carefully use a lighter or match as long as you don’t melt the wax too much). Press the two pieces together to “glue”.
• When you blow out a candle, place your fingertip in front of your mouth before blowing; this prevents hot liquid wax from spraying onto surrounding surfaces.
• When lighting a canister candle with a wick too low to reach with a normal match, use a piece of dry spaghetti. Just light the end and use as a match.

One thing I want to do in the future that I haven’t done in a long time is make my own candles. I’ll be on a quest to find wick material soon. In the meantime, I’m saving the containers and remaining wax from candles whose wicks have burned too short to use. Stay tuned.