Pages

Showing posts with label tea tree oil. Show all posts

Tuesday, June 7, 2011

June 7, 2011: Natural Dental Care Recipes

Bookmark and Share

If you’re working to get into – and stay in – shape this summer while looking your best, don’t forget your teeth. Nothing makes you look more unattractive than a dingy smile, especially since white teeth look great against a tanned face (but hopefully you’re using a tanning cream instead of damaging your skin in the direct rays of the sun!). Don’t let plaque or garlic breath ruin your attractive image.

Here’s a few natural teeth remedies that are easy and budget-friendly.

Tea Tree Oil

Prevent gum disease and kill bacteria by adding a drop of tea tree oil to your toothbrush before you squeeze on toothpaste. Since tea tree oil is a natural antiseptic, it helps keep your gums as clean as they can be, preventing plaque.

Cloves

Are you suffering from a toothache and can’t get to the dentist right away? Try stuffing a couple cloves in between your cheek and gum, right where you are feeling pain. This is an old remedy that’s been used for centuries to alleviate toothaches.

Parsley

Need to freshen your breath but you don’t have any gum in your purse? Much on a few sprigs of parsley. Parsley is a natural breath freshener. You might want to do as my mother told me: when you’re eating out, don’t toss that sprig of parsley decorating your food away; chew on it to remove the odors of your meal!

Tip: Eating foods full of Vitamin A and Vitamin C help your teeth stay healthy!

Monday, March 21, 2011

March 21, 2011: Miscellaneous Spring Cleaning Recipes

Bookmark and Share

I’ve been laboring under a delusion for some time now. I always thought the first day of spring – the vernal equinox – was scheduled for March 21st. It was my pastor who set me straight. I did a bit of research on www.timeanddate.com and found out that the equinox can occur on either the 20th or 21st of the month and this year it happened to be the earlier date. Spring officially began at 11:21 PM, marking the date when day and night became nearly equal.

So… I had meant for today’s post to be about spring cleaning in honor of the first day of spring but I guess I’m a few hours late. Oh well, this stuff happens. Onward and upward with our spring cleaning chores!

I tend to break up my spring cleaning chores because it’s just too much to do all at once. Each time I clean my house, I select one job that I never get around to but once or twice a year. A few weeks ago it was cleaning the back side of the wooden louvered doors to my pantry. Boy, that was a real eye opener! The back of the slats were black with grime. Yuck! Now, however, they are clean and dust-free. This past weekend I moved my couch out from the wall and vacuumed up all the dog hair, dust bunnies, and accumulated filth from underneath. It’s tasks like those that make spring cleaning very time-consuming – but oh so satisfactory.

I’ve shared lots of cleaning formulas this past month and now I’ve compiled a list of miscellaneous recipes for various cleaning tasks. Here they are, in no particular order.

Mold – make a paste of salt, vinegar, and a bit dishwashing liquid and apply to the mold, then wipe off with a wet rag. Or you can use foamy shaving cream.

Carpet Cleaner – make a paste of Fels Naptha soap suds, water, and borax. Test on a small, inconspicuous area first to be sure this solution doesn’t bleach your carpet.

Sterling Silver and other types of jewelry – scrub with white toothpaste then rinse with water. Be careful of soft stones, such as opals, which shouldn’t be scrubbed.

Mirrors – brew a week tea using plain Lipton or other black or green tea and put in a spray bottle. Wipe off with dry, white coffee filters.

Dusting (non-wood items) – in a container with a lid (like the one I use for homemade all purpose wipes), add water plus a few drops of lemon. Add paper towels (cut a roll in half) or white dusting cloths. Squeeze out excess water from the paper towel or cloth and use to clean the dust from veneers, plastics, countertops, etc.

Brass – use full-strength Worcestershire sauce (wipe on and then remove with a clean, damp cloth), ketchup, or a paste of lemon juice and salt.

Silk Flowers or plush baby toys – place in a paper bag and sprinkle with salt. Shake and remove.

Garbage Disposal – for tough odors, make a tray of vinegar ice cubes and toss a couple down the drain, then run the garbage disposal.

Toilet Bowl – if your toilet bowl is terribly stained, soak paper towels in cola, then plaster them along the inside rim of the bowl. Let sit for about an hour, then remove and flush.

Wednesday, March 16, 2011

March 16, 2011: All Purpose Cleaner –Cleaning Wipes

Bookmark and Share

Are you looking for a good, all-purpose cleaner that you can carry around the house with you instead of having to tote a bunch of different products or formulas? Then, this recipe is your answer! It works really well on any surface except glass (it isn’t streak-free) or wood (it will dry out any real wood furniture). But other than that, you can use it almost anything. It’s great in the kitchen and bathroom, in particular.

This one recipe is perfect to either put in a spray bottle or to make cleaning wipes.

All Purpose Cleaner

1 cup baking soda
1 cup liquid Castile soap
½ cup water
1 T. plain white vinegar
Few drops tea tree oil

Mix all ingredients in a spray or squirt bottle. Shake before using.

All Purpose Cleaning Wipes

Start with a container. I used a plastic tote as pictured above, but you could also use a large, empty baby wipes container or make one that works more like the commercial version with a covered plastic box that has an “X” slit cut into the top to pull the wipes through.

Mix all the ingredients in the above recipe in your container. You will have to add a bit more water, about 1 cup or more.

Cut a double roll of paper towels in half horizontally. Place one half of the paper towels in the cleaning solution. Let it sit for a couple hours or overnight, then remove the wet cardboard core. If all the cleaning solution has been soaked up, add a bit more water; if you put too much water in and your wipes are too wet, just pour off the excess. To use, just pull out the most interior paper towel; keep pulling from the inner area where the cardboard core used to be.

Voila! You’ve got all purpose cleaning wipes that cost a mere fraction of those expensive ones at the grocery store.

Tuesday, March 1, 2011

March 1, 2011: Natural Cleaning Product Ingredients, Fabric Softener Recipes

Bookmark and Share

Today, the month of March comes blowing in on a strong wind – at least where I live! March represents the beginning of spring (the vernal equinox occurs two-thirds of the way through) and a gradual thawing and warming that sends a signal to bulbs that it’s time to bloom (the official flower of the month of March is the daffodil).

March is actually named after the Roman god of war, Mars and it was considered the first month of the calendar year in ancient Rome. It’s fitting, then, that the month’s birthstones are bloodstone and aquamarine, both of which denote courage.

All right, enough March trivia!

What does spring mean to me? Usually it’s spring cleaning! March is the beginning of the early windy season here in the White Mountains (which can last until May and makes another appearance in the fall) and by the time spring officially arrives, my house needs a thorough cleaning of all the dust that sneaks its way past the windows and doors.


In honor of that age-old tradition, I’m dedicating March blog posts to natural cleaning products and tips. I’ll still include food recipes and the occasional beauty treatment, but I want you to be ready for deep cleaning projects that only cost pennies - so there's no excuse not to clean!

Before we get any further into this month devoted to spring cleaning, I thought it beneficial to compile a list of ingredients you will find helpful to always keep on hand. With these products, you will have a natural arsenal of supplies sufficient for just about any spring cleaning job on your list.

The beauty of using natural products for cleaning is that you really can’t go wrong trying them for any type of application. Most of us know that you can’t combine bleach with various other ingredients because it could create toxic fumes; since I don’t use anything as harsh as bleach, that’s not a concern. The harshest item on this list is ammonia – and I use it sparingly.

It’s doubtful you can ruin anything with natural products, either. In the following list, I’ve indicated what each product does in the way of cleaning so you can determine whether or not a specific ingredient is appropriate for a particular application.


Natural Cleaning Products List

•    Lemon Juice – Mild acid (corrosive to metals), mild antibacterial and antiseptic, water softener, whitening agent, cuts grease
•    White Vinegar – Mild (household formula) acid that dissolves mineral deposits, brightens, cuts grease
•    Borax (sodium borate) – Detergent, insecticide,
•    Washing Soda (sodium carbonate) – Water softener, water descaler, removes oil, grease, and alcohol
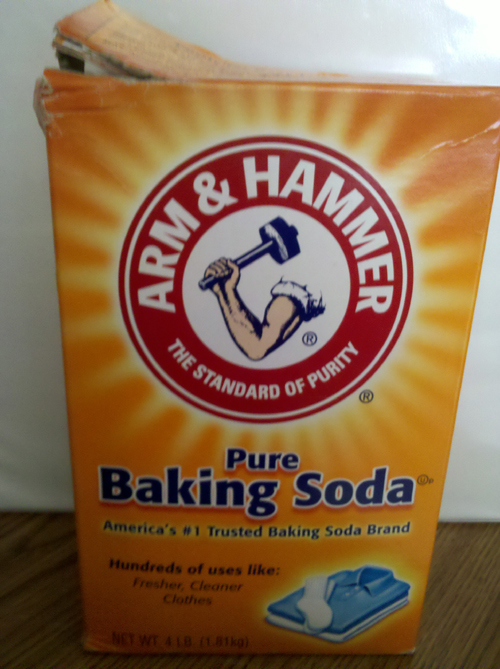
•    Baking Soda (sodium bicarbonate) - Disinfectant, antiseptic, acid neutralizer, water softener, odor neutralizer. But don't use on aluminum!
•    Cornstarch– Absorbs grease and moisture, mild abrasive
•    Dishwashing Liquid (dish soap) – Cuts grease
•    Tea Tree Oil – Antiseptic, antibacterial, antifungal, antiviral, pesticide
•    Salt – Sets dyes, removes rust, abrasive, absorbent
•    Castile Soap – Non-foaming cleanser made from plant-based oils, used in place of any type of cleanser for face, body, or household
•    Fabric Softener – Lubricant, conducts electricity
•    Ammonia – Degreaser, produces streak-free shine; use sparingly and never mix with bleach or any product that contains bleach; use in a ventilated area

There may be a few other products that are necessary for specific solutions, but this list represents the core ingredients that will be used in the majority of the natural, homemade cleaning product recipes I’ll share with you here.

And because I owe you a recipe or two, here are two uses for fabric softener. These recipes are economical, too – I’m still using the bottle of fabric softener I bought six months ago!


Dryer Sheets

Instead of buying a box of dryer sheets for the laundry at the store, make your own. Simply use an old washcloth. Before you put your wet laundry into the clothes dryer, dampen the washcloth, then sprinkle it with about a tablespoon of fabric softener. Scrunch up the washcloth so the fabric softener permeates it, then toss it into the dryer. This is far cheaper than using dryer sheets.

Bathroom Cleaner

If you’re like me, you use hairspray on a regular basis (hey, I have to – I’ve got this fine, thin, flyaway hair!). But when I spray it on, it doesn’t just land on my hair – it tends to coat the tile floor in my bathroom, too. Unfortunately, hairspray is tenacious and regular floor cleaners don’t cut through the layers of sticky stuff. The solution? Mix 1 part fabric softener with 2 parts warm water. Spray or pour on the floor where needed. Let it sit for a couple minutes, then wipe it up. Presto! The hairspray softens and comes right up!