Pages

Thursday, March 31, 2011

March 31, 2011: Asparagus Mushroom Casserole Recipe

Bookmark and Share

Few vegetables signal spring like asparagus. Of course asparagus is in season right now and will be right through Easter. Those tender green stalks are the perfect accompaniment to just about any dish, from salads to meat. I love asparagus but I’m always looking for new ways to serve it other than a simple stir fry or steam.

The following recipe is based on one from the Taste of Home cookbook, Everyday Light Meals. This was given to me by my secret sister last year, who turned out to be none other than Margaret, my pastor’s wife. She is such a dear and she really knows me well since most of my gifts had to do with cooking or the kitchen!

In typical Candy fashion, however, I’ve modified the recipe a bit. Here’s my version.

Asparagus Mushroom Casserole

4 T. butter
½ cup chopped onion
½ bunch fresh asparagus (you can also use a half package of frozen, thawed asparagus and add them in with the mushrooms at the end - but I wouldn't recommend canned)
2 T. flour
½ cup chicken broth
½ cup milk
Salt and pepper to taste
½ t. paprika
1 t. lemon juice
1 small can mushrooms, drained
½ cup bread crumbs

Snap off the tough ends of the asparagus and cut the stalks into one-and-a-half inch pieces. In a saucepan, melt 2 tablespoons of the butter. Add the chopped onion and the asparagus pieces. Cook for a couple minutes, until the onion is translucent.

Remove the vegetables with a slotted spoon and add another tablespoon of butter. Add in the flour and stir until mixed. Slowly add the chicken broth, and then the milk, stirring constantly until thickened and bubbly. Add the onion and asparagus, spices, lemon juice, and mushrooms. Pour into a greased casserole dish.

Melt the remaining tablespoon of butter and mix with the breadcrumbs. Sprinkle on top of the casserole.

Bake in a 375 degree oven for 25 – 30 minutes.

Note: I reduced this recipe to make just enough for 2 – 3 servings. Double the recipe for additional servings.

Tip: You can also use fresh mushrooms in this recipe; just add them in with the onions and asparagus while sauteing them in the butter.

Wednesday, March 30, 2011

March 30, 2011: Shake and Bake Recipe

Bookmark and Share

I remember when Shake n Bake first came out many decades ago (guess I’m showing my age here). It was marketed as a real timesaver – busy moms could just throw any type of moistened meat into the plastic bag, add the seasoning mix, shake, and presto! Nearly instant, tasty main dish. As I recall, there were formulas for chicken, pork, and fish.

I still like Shake n Bake meat occasionally. Just as it was promoted years ago, it is quick, easy, and tasty.

But the truth is, you don’t need to buy the spice mix and you don’t even need a plastic bag. Here’s a recipe for the homemade version of Shake n Bake. And it works just as well if you spread the spice mixture on a plate and dip the meat in it, plus that’s much more eco-friendly!

Homemade Shake and Bake Spice Mix

1 cup flour
1 cup cornmeal
4 t. ground cumin
2 t. onion powder
2 t. garlic powder
2 t. dried oregano
2 t. paprika
1 t. cayenne pepper
1 t. salt
1 t. black pepper

Mix and pour into a zip-top baggie or sealed container. Use ½ cup per four-person serving of chicken. Place in an oiled baking pan (don't use cooking spray). Bake chicken pieces in a 375 degree oven for about 40 minutes, turning halfway through the cooking time.

Pork Variation

Substitute sage for the cumin, dried rosemary for the oregano, and increase garlic powder to 3 teaspoons.Same cooking directions as for the chicken, but adjust cooking time according to thickness of pork chops.

Note: This recipe makes enough to use approximately four times.

Tuesday, March 29, 2011

March 29, 2011: Carpet Cleaning and Care Tips

Bookmark and Share

One thing that continues to amaze me about the house we bought here in the mountains is that whoever owned it before us decided it would be a good idea to replace the carpet before putting it on the market. That’s all good – except that the color they chose is a very light tan, almost off-white.

The problem? Well, for one thing we live on a dirt road. When the wind isn’t blowing dirt throughout the house, the rain turns it into mud, which is tracked in by us and our dogs. For another, the dirt around here is a reddish color which shows up really nicely against the light carpet. And then there’s our pellet stove. Even though I put down newspaper to catch the excess ash accumulation when I clean it, I always manage to get ashes and soot ground into the carpet.

So… needless to say I detest the carpet in my house! Eventually, when it gets really, really bad and we can afford it, the carpet will be replaced but for now I have to live with it – and do what I can to keep it somewhat clean.

As you go about your spring cleaning chores, keep these carpet tips in mind:

• To remove an indentation in the carpet from furniture that’s set in one place too long, drop an ice cube into the indentation. Remove the ice cube before it melts completely; wait for the carpet to dry before vacuuming.

• Before you vacuum, sprinkle the carpet with baking soda. Do this first as you begin to clean a room and by the time you are ready to vacuum, the baking soda will have absorbed all odors.

• For pet stains, sprinkle with baking soda immediately. The baking soda will absorb moisture and deodorize the fibers. When it has dried, vacuum away.

• Various recipes for cleaning carpet stains and spots:
    o Mix a bowl of warm water with 1/cup ammonia and a squirt of dishwashing soap.
    o Squirt the stain with dishwashing soap then scrub with a mixture of 2/3 cup vinegar plus 1/3 cup water.
    o Grate a bit of Fels Naptha bar soap, add borax and hot water to make a paste (you may have to heat this slightly to get the right texture OR shake very vigorously).
    o Use the homemade laundry soap recipe I shared with you earlier this month.

These recipes and tips aren’t going to make your carpet look brand new again (especially if it’s as dirty as mine is!) but they are a good alternative to buying expensive spray cleaners – and they’re always handy since the ingredients are so simple.

Monday, March 28, 2011

March 28, 2011: Onion and Leek Focaccia Recipe

Bookmark and Share

This is one of the first recipes I made after joining my church and everyone just loved it – it became my most requested recipe for quite some time!

This focaccia bread is almost like a white pizza – and, in fact, I’ve used the bread recipe as pizza dough before. If you add a few more veggies and some meat (if you prefer), it really is just like pizza. For a traditional style pizza, add a tomato sauce first; for a white pizza, smear olive oil and butter across the top.

When I prepared this focaccia recently, I served it with spaghetti one night and beef stew the next. It was an excellent side dish for both meals, functioning as a bread and a vegetable all rolled into one. You could certainly add more veggies, such as broccoli, bell peppers, tomatoes, etc.

Onion and Leek Focaccia

¾ cup warm water
1 ½ t. yeast
1 T. sugar
1 t. salt
2 T. olive oil
2 cups flour

Dissolve the yeast in the warm water (I use my Kitchenaid stand mixer and do this in the warmed mixer bowl). Add the sugar, salt, olive oil, and one and a half cups of the flour. Mix (speed two on the mixer or with a wooden spoon in a bowl) until the flour is incorporated, then add remaining half cup of flour to the mixer (if you are mixing by hand, knead the dough on a floured surface). Continue mixing/kneading until it forms a smooth ball.

Grease a pizza pan with olive oil, using your fingers. Take the ball of dough and stretch it out with your oily fingers until it evenly covers the pan. Cover with a clean cloth and let rise in a warm place until doubled, about half an hour.

Onion and Leek Topping:
1 leek, white and light green parts only, thinly sliced
1 small white onion, thinly sliced
2 cloves garlic, minced
4 T. butter
3 ounces mozzarella cheese (not fresh), shredded

While the dough is rising, prepare the onion topping. Melt the butter in a large saucepan over medium-low heat. Add the leek, onion, and garlic. Stir frequently until the vegetables are softened and just beginning to brown. Remove from heat.

When the dough has risen, use the handle of a wooden spoon and poke it into the surface every inch or so, about halfway down (don’t make holes in the dough!). Spread the onion and leek topping across the dough; top with shredded cheese.

Baked in 400 degree oven for 15 – 20 minutes. If desired, place under the broiler for a couple minutes to brown the cheese.

Sunday, March 27, 2011

March 27, 2011: Red Chile Beef Enchiladas Recipe

Bookmark and Share

Being from New Mexico, I was introduced to hot red chile at a young age. I’ll never forget the first time I ordered red chile enchiladas at a little cafĂ© in downtown Silver City; one of those places that looks like a hole in the wall from the outside but serves the most fantastic food. I was 11 years old and the only way I could make it through that meal was to drink about a gallon of water! My ears teared and my nose ran but by the time I was done eating, I was hooked by the intense, wonderful flavor of the red chile sauce.

To this day, my all-time favorite meal is red chile enchiladas, New Mexico style, which means the tortillas (my fave is blue corn) are stacked flat on the plate instead of rolled up. The best topping? A fried egg (sometimes referred to as "ranchero style"). Yum, yum, yum!

This recipe for red chile beef enchiladas is casserole style, which is much easier to make, particularly if you are serving a few people (I often make enchiladas for myself for lunch on a whim - cheese only - and those are New Mexico style). It also uses powdered red chile, which is easier to work with, but the sauce could certainly be made with red chile pods soaked in hot water and pureed in a blender, as is traditional.

Red Chile Beef Enchiladas

Red Chile Sauce:
3 T. grease (lard is traditional; bacon grease adds a lot of flavor; olive oil is healthier)
3 T. flour
1 t. salt (or to taste; red chile sauce really needs a lot of salt)
1 t. garlic salt
½ t. ground black pepper
¼ cup red chile powder
2 cups chicken broth
¼ cup water
1 dozen corn tortillas
Cooking spray
4 ounces Monterrey Jack cheese, grated or Mexican cheese, such as cotija

In a medium-sized saucepan, melt the grease over medium heat. Add the flour and stir constantly for one to two minutes. Add the salts, pepper, and chile powder, stirring just to mix. Slowly add the chicken broth, stirring constantly. Turn the heat to low and let it simmer until it comes to a gentle boil. Stir occasionally. If the sauce is too thick, add water. It should be the consistency of tomato sauce.

Beef:
1 lb. ground beef
½ yellow or white onion, diced
2 cloves garlic, minced
1 T. flour
½ t. cumin
½ t. garlic salt
1 t. red chile powder

In a large skillet, brown the ground beef over medium heat. Add the onion and garlic and cook until the veggies are softened. Drain most of the grease, leaving about one tablespoon in the pan. Add the flour and seasonings and mix well.

To prepare the tortillas:
Use a small, microwavable plate. Spray both sides of the first tortilla with cooking spray and put on the plate. Spray the top only of the next tortilla and place it, spray side up, on top of the first tortilla. Repeat with remaining tortillas. Cover the dish with plastic wrap and microwave on high for 1 – 2 minutes.

Note: Traditionally the tortillas are fried in oil, but this is a much healthier and less greasy alternative. If you’re a purist, go ahead and fry the tortillas in hot oil for a few seconds on each side until just softened; drain on paper towels.

To Assemble:
Use a 13 x 9” pan (I prefer glass but if you are using a metal pan, coat it with cooking spray first). Take about ¼ cup of the red chile sauce and spread it across the bottom of the pan.

Take one softened tortilla and place about 1 tablespoon of the ground beef mixture along one edge. Roll it up and place it, seam side down, in the pan. Continue until all tortillas are filled and rolled. Pour the remaining red chile sauce over the tortillas, then top with grated cheese.


Cover the pan with foil and bake in a 350 degree oven for 30 minutes. Remove the foil and bake for 5 minutes more, or until cheese is melted and bubbly.
The red chile beef enchiladas served on a plate with homemade refried beans, tortilla chips, and a simple salad of sliced tomatoes and avocados.

Saturday, March 26, 2011

March 26, 2011: Oven Cleaning Tips

Bookmark and Share

When you cook and bake as much as I do, your ovens (both microwave and range) are bound to get nasty, coated with bits of dried food, grease and burned-on sauces.

I’m lucky enough to have double wall ovens, which really comes in handy over the holidays. But since I was severely limited in size, I had to select a pair with one that is self-cleaning and the other not. Of course, I try not to use the one I have to manually clean, but sometimes I can’t help it.

I’ve had my share of kitchen mishaps. One of the worst was a carrot cake. I’d gotten the recipe from a magazine. I thought that since it was a published recipe, it must have been tested and consequently, it would be a trustworthy one. Boy, was I wrong!

Although I rarely measure ingredients exactly, I did so with this recipe because it was the first time I was making it. I thought that when the batter was done it looked a bit too goopy thin. I should have listened to my instincts. The recipe was for a three-layered cake so I had to use both ovens. I went ahead and poured in the goopy batter, set the timer, and went about my business while my husband napped on the couch in the living room. It wasn’t more than 10 minutes or so into baking that the smoke alarm in my house went off. I rushed into the kitchen only to find both ovens on fire! That goopy batter had acted like a volcano, bubbling up and spilling over like a carrot-fueled Mount Vesuvius in both ovens. When it hit the burner elements, it ignited into flames.

What to do? While my husband still slept, amazingly enough, I opened all the doors to let the smoke out then quickly grabbed my trusty box of baking soda (in the economy size). I opened both ovens and sprinkled a bit of baking soda inside. No change. I sprinkled in some more, and some more, until the entire box was nearly gone. The flames finally went out and the smoke alarm went off.

By the time DH finally roused himself from his happy nappy, the entire house smelled horrible and the bottoms of both ovens were coated in two inches thick of white powder.

It took forever to clean up that mess – and to this day I still find traces of baking soda on the top edge of my lower oven occasionally.

The (relatively) good news? Baking soda is a natural, mild abrasive and cleanser. At least I didn’t have to clean fire extinguisher foam out of them! Instead, I used wet paper towels and both ovens came out glistening clean by the time I was done.

So there’s Tip #1: when on fire, use baking soda to put out the flames in your oven.

Now here’s a couple recipes for cleaning your oven and microwave when there’s no fire to put out.

Oven Cleaner

Spray interior of your oven generously with full-strength ammonia. Close the door and let it sit overnight. The next morning, use a damp sponge or paper towels to wipe away the softened mess.

Tips: Be sure your kitchen is adequately ventilated and your exhaust fan is turned on while cleaning. And try not to stick your head in the oven and inhale the fumes from the ammonia.

Microwave Cleaner

Pour plain white vinegar into a medium-sized bowl and place it in your microwave. Turn it on high for one minute then let it sit, unopened, for an hour. Open the door and wipe away the mess with damp paper towels or a sponge. This will also remove odors from your microwave.

Friday, March 25, 2011

March 25, 2011: Tortilla Rollups

Bookmark and Share

Today is my grandson’s very first birthday! My precious little boy is having a birthday party tomorrow. I asked his mom what I could bring for munchies to serve before pizza and birthday cake and she said, without any hesitation whatsoever, “Tortilla roll-ups!”

I made them for her baby shower over a year ago (that’s when this photo was taken – wasn’t it cute the way everything was served in boy toys?) and she absolutely loved them. Of course if my dear daughter-in-law wants anything, she gets it! I think these tortilla roll-ups are second only to Grammy’s homemade dinner rolls when it comes to her favorites.

The recipe below is enough to make a big platter-full, like the one you see in the photo. Serve them with salsa (homemade is preferable but good old Pace picante sauce will work in a pinch).

Tortilla Rollups

2 packages flour tortillas, burrito size
2 8-ounce packages cream cheese
1 can large black olives, diced
2 cans chopped mild green chiles (or about 3 fresh roasted green chiles, peeled, seeded, and chopped)
5 green onions, finely sliced
3 cloves garlic, finely minced
1 bunch cilantro, minced (optional)
2 t. cumin powder

1 t. salt (or to taste)
2 t. chili powder
1 t. black pepper

Mix the softened cream cheese with the rest of the ingredients. Taste and adjust seasonings as necessary.

To assemble, take one flour tortilla and spread it with about one-quarter cup of the cream cheese mixture; don’t make it too thin (they won’t be very tasty) or too thick (the filling will ooze out when you cut the tortilla). Shape into a log by tightly rolling the tortilla from one edge to the other. When you’ve used up all the cream cheese, cover the logs with plastic wrap and place them, seam side down, in the refrigerator for about an hour so that the filling hardens up slightly.

To serve: place each tortilla log on a cutting board and slice into one-inch thick slices. Arrange the horizontal slices (they should look like pinwheels) on a platter, around a bowl of salsa.

Thursday, March 24, 2011

March 24, 2011: Pad Thai with Peanut Sauce Recipe

Bookmark and Share

I don’t know about you but I love Thai food. The ingredients taste so fresh (perfect for spring!) and the combination of slightly sweet, slightly hot, and always spicy is mouthwatering. Although I prefer Pad Thai noodles with chicken satay, I’ve also served this dish with roasted chicken, grilled skewers (as pictured here) and fish. For a main dish, add a protein, such as shrimp. And if you have leftover peanut sauce, it’s great as a dipping sauce for chicken nuggets or as a salad dressing.

I first had Pad Thai made from a boxed mix I bought at the grocery. As I usually do, I thought it couldn’t be too hard to make them from scratch and it would surely be cheaper (that’s an understatement – the box costs about 60 percent more than the made-from-scratch version). I think the homemade version is way more flavorful, as well. Try this recipe and decide for yourself.

Pad Thai Noodles

1 package rice noodles
1 T. Sesame oil
1 ¼ cup bean sprouts (fresh or canned) – reserve a few for garnish
2 eggs
3 – 4 scallions, sliced thinly on the diagonal – reserve a few for garnish
¼ cup chopped peanuts

Soak the noodles in hot water while you are slicing the vegetables and preparing the sauce, about 15 minutes.

Peanut Sauce:

1 cup coconut milk
1 T. red chili sauce
1 t. curry powder
1 t. Asian fish sauce
½ cup peanut butter (chunky or smooth, depending on preference)
1/3 cup chicken stock
¼ cup brown sugar
1 T. fresh lime juice (substitute lemon juice if necessary)
1 t. salt

Add all ingredients to a saucepan and simmer over medium heat, stirring constantly, for about 5 minutes or until thickened.

To Make the Noodles:

Using a wok or large skillet, heat the sesame oil to 325 degrees. Add the bean sprouts and green onions and cook for about 1 minute. Add the drained noodles and stir together. Make a well in the middle of the wok by pushing the noodle mixture to the sides. Drop in the two eggs and scramble with a spatula. Add salt and pepper to taste. Fold the eggs into the noodles and add about ½ cup of the peanut sauce. The noodles should be sticky, but not overly saucy; add more sauce if necessary.

To serve, mound the noodles on a plate and sprinkle with the reserved bean sprouts, scallions, and chopped peanuts.

Wednesday, March 23, 2011

March 23, 2011: Two Versions of Macaroni Salad Recipes

Bookmark and Share

One of the best side dishes for spring is macaroni salad. It’s cool and fresh and light and goes perfectly with an Easter ham or leg of lamb. It’s also great for picnics and luncheons with hamburgers or hot dogs.

When I think of macaroni salad, the first thought that comes to mind is of my mother’s version. I inherited all of her cookbooks and I ran across an old recipe from the 50s that I think she loosely based hers on because I’ve never found another formula quite like hers that anyone else makes. Back in those days, Spam wasn’t email junk, it was that good old combination of pork shoulder and ham in a can with a little metal key that was touted as an affordable way to feed your family. And that’s when mom created her macaroni salad recipe with Spam. If you don’t particularly care for Spam (like my DH), don’t worry. I’ve included an alternate recipe that my husband prefers.

Do keep in mind that the measurements I’ve provided here are just approximate. Mom never wrote down her recipe and since I’ve been making it for decades, I just throw the ingredients together as Mom taught me. So always taste the sauce and be sure it is palatable to you!

Macaroni Salad Version 1

12 - 16 ounce package elbow macaroni (it always used to come in a one-pound package but I’ve noticed that you now only get 12 ounces!)
1 ½ cups mayonnaise (not Miracle Whip)
2 t. lemon juice, fresh or bottled
2 t. sugar
Salt and pepper to taste
½ white or yellow onion, finely minced
1 can peas
1 can Spam, cut into medium dice
3 – 4 hard boiled eggs
Paprika

Cook the macaroni according to the package directions. Drain, rinse, and set aside to cool.

In the meantime, prepare the sauce. In a large bowl, mix together the mayo, lemon juice, sugar, salt and pepper. Taste it and adjust accordingly; it should be slightly sweet-tart. Add the onion, peas, and Spam. Slice the hard boiled eggs and lay across the top of the salad. Sprinkle lightly with paprika.

Macaroni Salad Version 2

12 – 16 oz. salad macaroni
1 ½ cups mayonnaise (not Miracle Whip)
2 t. lemon juice, fresh or bottled
2 t. sugar
2 t. dill weed
Salt and pepper to taste
½ red, white or yellow onion, finely minced (can also substitute scallions)
About 1 cup sliced green, pimiento-stuffed olives
3 hard boiled eggs

Cook the macaroni according to the package directions. Drain, rinse, and set aside to cool.

In the meantime, prepare the sauce. In a large bowl, mix together the mayo, lemon juice, sugar, dill weed, salt and pepper. Taste it and adjust accordingly; it should be slightly sweet-tart. Add the onion, olives, and chopped hard boiled eggs.

Tip: Easily turn this into potato salad by substituting 6 to 7 peeled, boiled potatoes, chopped, for the macaroni. You may have to add a bit more dressing since potatoes will absorb more. 
To freshen the macaroni salad the next day, add another dollop of mayo.

So which do you prefer? Mom’s recipe or my updated one?

Tuesday, March 22, 2011

March 22, 2011: Sourdough Pancakes

Bookmark and Share

Did you make a sourdough starter back in February when I gave you the recipe for sourdough starter? If so, how’s your starter doing? You didn’t let it die, did you?

If not, this recipe for pancakes, courtesy of my friend Kathy who also gifted me with my sourdough starter, is just amazing. A couple years ago my husband and I won a trip to Chicago to see Jason Michael Carroll. Before we left, we stopped at the Original Pancake House in downtown Chicago. This recipe is much like their pancakes – very light on the inside, crispy on the outside, and filled with fantastic flavor. If you’ve never had a sourdough pancake, you are in for a real treat! They are especially good topped with jam, a fruit spread, or a fruity syrup.

Tip: You have to take our your starter the night before, so plan on having these pancakes for breakfast ahead of time – a weekend morning is a good choice.

Sourdough Pancakes

Take sourdough starter out at night and pour into glass or plastic bowl. Add 2 cups flour and 2 cups warm water. Cover lightly with a cloth and put in a warm place overnight (your oven – not turned on, of course – is a good location during colder months).

The next morning:

Take out 1 cup of the mixture and pour it into a clean container. This is your new batch of starter.

To remaining batter add:

2 T. sugar
1 t. baking soda
2 eggs
2 T to ¼ cup oil (or melted butter)

Mix just until all ingredients are incorporated. Let it sit for a few minutes, then cook on a greased griddle as you would any other pancake. Watch these pancakes carefully; because they are a bit thinner than normal pancakes, they cook very quickly – and bubble a LOT!

Enjoy!

Monday, March 21, 2011

March 21, 2011: Miscellaneous Spring Cleaning Recipes

Bookmark and Share

I’ve been laboring under a delusion for some time now. I always thought the first day of spring – the vernal equinox – was scheduled for March 21st. It was my pastor who set me straight. I did a bit of research on www.timeanddate.com and found out that the equinox can occur on either the 20th or 21st of the month and this year it happened to be the earlier date. Spring officially began at 11:21 PM, marking the date when day and night became nearly equal.

So… I had meant for today’s post to be about spring cleaning in honor of the first day of spring but I guess I’m a few hours late. Oh well, this stuff happens. Onward and upward with our spring cleaning chores!

I tend to break up my spring cleaning chores because it’s just too much to do all at once. Each time I clean my house, I select one job that I never get around to but once or twice a year. A few weeks ago it was cleaning the back side of the wooden louvered doors to my pantry. Boy, that was a real eye opener! The back of the slats were black with grime. Yuck! Now, however, they are clean and dust-free. This past weekend I moved my couch out from the wall and vacuumed up all the dog hair, dust bunnies, and accumulated filth from underneath. It’s tasks like those that make spring cleaning very time-consuming – but oh so satisfactory.

I’ve shared lots of cleaning formulas this past month and now I’ve compiled a list of miscellaneous recipes for various cleaning tasks. Here they are, in no particular order.

Mold – make a paste of salt, vinegar, and a bit dishwashing liquid and apply to the mold, then wipe off with a wet rag. Or you can use foamy shaving cream.

Carpet Cleaner – make a paste of Fels Naptha soap suds, water, and borax. Test on a small, inconspicuous area first to be sure this solution doesn’t bleach your carpet.

Sterling Silver and other types of jewelry – scrub with white toothpaste then rinse with water. Be careful of soft stones, such as opals, which shouldn’t be scrubbed.

Mirrors – brew a week tea using plain Lipton or other black or green tea and put in a spray bottle. Wipe off with dry, white coffee filters.

Dusting (non-wood items) – in a container with a lid (like the one I use for homemade all purpose wipes), add water plus a few drops of lemon. Add paper towels (cut a roll in half) or white dusting cloths. Squeeze out excess water from the paper towel or cloth and use to clean the dust from veneers, plastics, countertops, etc.

Brass – use full-strength Worcestershire sauce (wipe on and then remove with a clean, damp cloth), ketchup, or a paste of lemon juice and salt.

Silk Flowers or plush baby toys – place in a paper bag and sprinkle with salt. Shake and remove.

Garbage Disposal – for tough odors, make a tray of vinegar ice cubes and toss a couple down the drain, then run the garbage disposal.

Toilet Bowl – if your toilet bowl is terribly stained, soak paper towels in cola, then plaster them along the inside rim of the bowl. Let sit for about an hour, then remove and flush.

Sunday, March 20, 2011

March 20, 2011: Potato and Cheese Pierogi Recipe

Bookmark and Share

I love pierogis. I guess it just makes sense since my family from my mother’s side was Polish – although Mom never made them. I discovered them in the frozen food aisle at the grocery store and once I’d tried them, I was hooked.

I always wanted to try making my own and finally braved it recently. I had leftover mashed potatoes, so that’s what made me take the plunge.

I found a recipe online at this page and because the heading said it had been handed down from generation to generation, I figured it was a good one to try. The instructions here are daunting and make it sound very difficult to make pierogis, but I thought it was actually pretty easy; probably depends on your cooking experience and level of expertise, I reckon.

As usual, I’ll give you the recipe as it was posted but give you my tips along the way.

Pierogi Dough
2½ - 3 cups flour
1 t, salt
1 egg
2 T. sour cream
About ½ cup lukewarm water

Mix all ingredients together, and knead just a bit. The dough should not be very smooth, and it should be quite sticky. Let stand covered with an inverted bowl for about half an hour before using. Take either all, or a portion of the dough, and roll it out until it is 1/16" thick. You will have to use plenty of flour to keep the dough from sticking to the rolling pin and rolling surface. You can also flip the dough several times as well. (Your work surface dictates how much you can roll out at one time.) The thickness is very important.

Tip: I found this recipe to be way too “wet”. I would add water about a tablespoon at a time or you will end up adding way more flour to make a workable dough. I figured the dough should resemble traditional pasta dough and this is, after all, a Polish pasta dish.

Filling
Mashed potatoes
Grated cheese

As I said, I used leftovers (if you have any leftover champ, that would work great) and sprinkled a bit of Parmesan on top. The filling was a bit dry, though (as were the potatoes – I’d used a new recipe I didn’t really care for and the leftovers weren’t good for anything) so I’ll probably opt for a different type of cheese next time, such as Havarti or fontina or even chevrĂ©.

Assembling the Pierogis

First, start a large pot of water boiling, add a couple tablespoons of salt. This is for cooking the pierogi.

Take your thinly rolled dough and cut out circles between 3 and 4" in diameter using any type of round device or container with a sharp rim. Add a dab of filling to each circle. A heaping teaspoon is plenty, but use your own judgment here. Now take your finger, dip it into warm water and coat the edge of half the pierogi circle with water. Make sure the half edge is completely wet. Then take the opposite dough edge and fold and stretch it over to the wet edge. Pick up the pierogi and with your fingers seal the edges tightly together. Make sure no filling has gotten on the sealing edge. If the pierogi looks too thin, dip the thin surface in flour before placing into the water.

Once a batch is finished place carefully in the boiling water. Total boiling time is 10-12 minutes. Turn or at least stir the pierogi after about 5 minutes. When finished, remove to a colander and rinse with cold water, then place on a cookie sheet to cool.

Cooking the Pierogis

I like pierogis best when they are fried with thinly sliced onions. Fry the onions first in butter or a combination of olive oil and butter, then add the peirogis to the hot pan. You only need to crisp up the outsides, as long as they’re not ice cold - fry a couple minutes per side until golden brown.

That’s it! Serve the pierogis hot as a side dish; they’re great with pork chops, sausages, meatloaf – just about any type of protein.

Saturday, March 19, 2011

March 19, 2011: Glass Cleaner Recipes

Bookmark and Share

One cleaning product you are sure to have around the house is glass cleaner – probably that blue liquid that costs a lot (I suspect you’re really paying more for the container than the ingredients because the formula is pretty simple). Instead of paying for a new bottle of glass cleaner, keep the spray container and refill it with one of these recipes.

Glass Cleaner Recipe #1

Plain white vinegar
Rubbing alcohol
Juice from half a lemon or about 1 T. bottled lemon juice

Mix together 3 parts vinegar to 1 part rubbing alcohol plus the lemon juice. Shake and spray.

Glass Cleaner Recipe #2 (I already shared this one earlier in the month in a post about cornstarch for cleaning but I’m including it here again for your convenience)

½ cup ammonia
½ cup white vinegar
2 T. cornstarch

Add all ingredients to a pail of warm water. Apply with a cloth, then wipe with a clean, dry cloth or a wad of newspaper.

Glass Cleaner Recipe #3

½ cup water
½ cup rubbing alcohol

Mix together in a spray bottle.

Tip: For streak-free windows or mirrors, use wadded up newspapers or coffee filters to dry the glass cleaner from the surface.

Friday, March 18, 2011

March 18, 2011: Apple Spice Cake Recipe

Bookmark and Share

I’ve been pressed into service once again – this time making a baked goodie to sell tomorrow morning at a bake sale for American Indian Christian Mission. I wasn’t sure what I was going to make but I had some granny smith apples that needed to get used up so I settled on his recipe for apple spice cake.

It’s a really dense cake that gets moist when you pour the sauce on top. It reminds me of a rum cake, honestly. Although the recipe calls for brandy, I substituted amaretto, because that’s what I had. I think the almond and apple flavors melded nicely – but now I’m second guessing my choice to make an alcohol-laced cake for a church bake sale. Ah, well, there’s no turning back now!

Here’s the recipe as it was printed in Relish Magazine plus a few small alterations, a la Candy. BTW, the cake looks awful in this photo but looked much better on the plate - it's really not green...

Apple Spice Cake

Cake:
1 ¼ cup vegetable oil
2 cups sugar
3 eggs
3 cups flour
1 ¼ t. ground cinnamon
½ t. ground cloves
½ t. ground cardamom
1 t. baking soda
½ t. salt
3 ¼ cups coarsely chopped, peeled and cored apples (such as Cortland, Empire, or Winesap – I used 6 medium granny smith apples)
3 T. brandy (I substituted amaretto, or you could use 1 teaspoon vanilla)

Glaze:
¼ cup butter
2 T. brown sugar
6 T. granulated sugar
3 T. brandy (again, I used amaretto but you could substitute 1 teaspoon vanilla)
2 T. heavy cream (I used half and half since that’s what I had on hand)

Preheat oven to 325 degrees. Grease and flour a bundt pan (or use cooking spray for baking).

Combine oil and sugar (I used my Kitchenaid stand mixer) in a large mixing bowl. Beat with a wire whisk until thick and opaque. Add eggs one at a time, beating after each addition.

Sift together flour, spices (I just pumpkin pie spice plus a bit extra cinnamon), baking soda and salt. Add flour mixture to egg mixture; blend well. Add apples and brandy all at once and stir until apples are evenly distributed.

Pour batter in prepared pan. Bake for 50 to 60 minutes until a toothpick inserted into the middle comes out clean. Remove from oven and let cool for 10 minutes before removing from pan.

While cake is baking, make glaze. Melt butter in a saucepan over low-medium heat and stir in sugars. Add brandy and cream; stir well. Bring to a boil, reduce heat and simmer 4 minutes. Remove from heat and let cool slightly.

After you’ve plated the cake, poke holes in it all over with a toothpick. Slowly pour the glaze over the top.

Thursday, March 17, 2011

March 17, 2011: Irish Champ Recipe

Bookmark and Share

Of course I wanted to honor St. Patrick on his day by sharing an Irish recipe with you. The problem is that my dear husband doesn’t really care for corned beef (besides which it would make enough to feed an army and we’d have leftovers for weeks) and he certainly doesn’t care for the lamb that is traditionally part of an Irish stew. So I figured that mashed potatoes with scallions was my safest bet!

The Irish call it champ, and according to many sources, this is the most widely eaten potato dish in all of Ireland.

The odd thing is that this recipe calls for the potatoes to be cooked without peeling them first, which is the way my mother taught me to cook potatoes for mashed, salad – anything. She wasn’t Irish; in fact her family was Polish. It wasn’t until my mother-in-law showed me how much easier it was to peel cold potatoes and cook them in smaller pieces that I adopted her method. What about you? Did you learn to cook potatoes with or without the skins on?

So… Happy St. Patty’s Day and enjoy this traditional dish!

Champ (Mashed Potatoes)

6 to 8 baking potatoes, unpeeled
3 to 4 scallions (green onions)
1 ½ cups milk
6 T. butter (or more, to taste)
Salt and pepper to taste

Scrub potatoes, place them in a pot and cover them with water. Bring the water to a boil, then reduce heat to a gentle boil and cook until soft, about 25 minutes. Remove from the pan and peel when cool enough to handle.

Finely chop the green onions, using both the white and green parts. Add to the saucepan used for boiling the potatoes. Add the milk and slowly bring just to a boil. Simmer for a few minutes, stirring constantly with a wooden spoon. Turn off the heat and let the mixture stand until slightly cooled. Add the cooked potatoes and mash with a fork. Add the butter and beat with a mixer until smooth. Season to taste with salt and pepper. Before serving, garnish with a pat of butter in the center of the mound (in a serving bowl or on a dinner plate).

Serves 4 to 6.

Wednesday, March 16, 2011

March 16, 2011: All Purpose Cleaner –Cleaning Wipes

Bookmark and Share

Are you looking for a good, all-purpose cleaner that you can carry around the house with you instead of having to tote a bunch of different products or formulas? Then, this recipe is your answer! It works really well on any surface except glass (it isn’t streak-free) or wood (it will dry out any real wood furniture). But other than that, you can use it almost anything. It’s great in the kitchen and bathroom, in particular.

This one recipe is perfect to either put in a spray bottle or to make cleaning wipes.

All Purpose Cleaner

1 cup baking soda
1 cup liquid Castile soap
½ cup water
1 T. plain white vinegar
Few drops tea tree oil

Mix all ingredients in a spray or squirt bottle. Shake before using.

All Purpose Cleaning Wipes

Start with a container. I used a plastic tote as pictured above, but you could also use a large, empty baby wipes container or make one that works more like the commercial version with a covered plastic box that has an “X” slit cut into the top to pull the wipes through.

Mix all the ingredients in the above recipe in your container. You will have to add a bit more water, about 1 cup or more.

Cut a double roll of paper towels in half horizontally. Place one half of the paper towels in the cleaning solution. Let it sit for a couple hours or overnight, then remove the wet cardboard core. If all the cleaning solution has been soaked up, add a bit more water; if you put too much water in and your wipes are too wet, just pour off the excess. To use, just pull out the most interior paper towel; keep pulling from the inner area where the cardboard core used to be.

Voila! You’ve got all purpose cleaning wipes that cost a mere fraction of those expensive ones at the grocery store.

Tuesday, March 15, 2011

March 15, 2011: Spinach Artichoke Dip Recipe

Bookmark and Share

Another Sunday, another party!

Last weekend after church we celebrated one of our member’s 50th birthdays. It was a lot of fun but this was following on the heels of celebrating Pastor Tom’s 65th birthday and Valentine’s Day before that. Truth be told, I’m a bit partied out.

For this last celebration, I only had to bring a side dish (although I ultimately decided on an appetizer). This spinach artichoke dip was a real hit; nearly everyone asked me for the recipe. *I’m posting it here for all of you ladies who asked!

I originally got this recipe from a New Orleans site back in 2000. Although it was fine as is, I made some variations, mainly so I could put in my crock pot for heating while I was at church. Here is my slightly adjusted version for the crock pot.


This picture is what was left of the dip since I forgot to photograph my big, beautiful dish before everyone dug in. It was just enough for a snack after I added a little more shredded Monterey Jack cheese.


Spinach Artichoke Dip

1 cup green onions, finely chopped (about 4)
2 cloves garlic, finely chopped
1/3 stick butter
1 lb. fresh spinach
1 can water-packed artichoke hearts or artichoke quarters
8 oz. cream cheese
6 oz. mozzarella cheese, shredded
4 oz. sour cream
1 ½ t. Worcestershire sauce
2 dashes Tabasco (or more to taste)
1/3 cup Parmesan or Romano cheese, finely grated
1 ½ t. dried dill
1 cup Monterey Jack cheese, shredded

Turn your crock pot up to its highest heat setting. Add the butter. As it begins to melt, add the chopped onion and garlic. Cook until the vegetables begin to soften.

Tear the washed spinach into small pieces and add to the veggie mixture. Toss until it is coated with butter. Let it wilt for a few minutes before adding remaining ingredients (up to the Monterey Jack cheese).

Turn your crock pot to low and let it heat through. Before serving, top with shredded Monterey Jack cheese and let it melt; then serve in the crock pot. OR pour into a baking dish, top with cheese, and place it in a 350 degree oven for 5 – 10 minutes until bubbly.

Note: You can make this recipe in a saucepan, too. Just start at medium heat to melt the butter and cook the veggies. After you’ve mixed in all the ingredients, pour it into a baking dish, top with the Monterey Jack cheese, and heat at 350 degrees for about 20 minutes.

Monday, March 14, 2011

March 14, 2011: Vodka as a Cleaning Agent

Bookmark and Share

When it comes to household cleaning chores, vodka works much the same as rubbing alcohol and vinegar while really imparting a sparkly shine. Of course, if you’re going to use vodka for cleaning, buy the cheapest stuff you can find. It would be shame to use tasty Grey Goose for this purpose!

Uses for Vodka:

* Bathtub Cleaner: Spray full strength onto the caulking around your tub/shower. Let it sit for 15 minutes or so then scrub with an old toothbrush to remove any lingering black spots. No need to rinse!

* Jewelry Cleaner: Clean your jewelry with full-strength vodka. If you have one of those containers with a basket and brush, fill it with vodka when it’s empty. Drop your gold and precious stone (except for soft stones such as opals) jewelry into the vodka and let it sit for a couple minutes. Scrub the crevices with a toothbrush or the tiny brush that comes with commercial cleaning solution. Wipe with a soft cloth for an amazing sparkle.


* Eyeglass cleaner: Spray with full strength vodka (or rubbing alcohol) and rub dry with a soft cloth. Once again, if you’ve got a container –those little spray bottles – from a commercial cleaner you purchased, fill it with vodka after it runs out. You can also add a couple drops tea tree oil if you want.

* Washing delicate clothing: I haven’t tried this one so use at your own risk. If you have a piece of expensive clothing with fancy beaded or other type of decorations that require dry cleaning only, freshen them up between cleanings with vodka. Turn inside out and lightly spray a bit of vodka on the underarm and neck areas. This removes odors and yellowing.

And hey, you might just want to partake of a bit of your “cleaning agent” while you’re doing your chores around the house!

Sunday, March 13, 2011

March 13, 2011: Round Steak Recipe

Bookmark and Share

If you’re looking for a really cheap, really easy meal to make for your family, this recipe for round steak fits the bill.

A friend of mine from Wisconsin used to request her mother make this dish every time she visited Phoenix during the winter months. I asked her to show me how to make it and it’s been a favorite of my husband’s ever since. It has to be served with homemade mashed potatoes so you can use the potato water to make the creamy gravy. In the picture below, I served the steak and potatoes with fresh green beans but the usual choice is corn.

Of course, this dish is also really fattening (isn’t all the good stuff?) in addition to being cheap and easy…. so it’s best reserved for every now and then. Here goes!


Round Steak with Pan Gravy

1 pound thinly sliced round steak
Salt and pepper to taste (or use garlic salt)
Flour
Vegetable or olive oil (the olive oil make it just a wee bit healthier)
Milk

Start preparing the meat about half an hour before you’re ready to cook dinner. Trim off all the fat and any gristly veins. Cut it into small pieces about three inches in diameter, if necessary. Place the steaks in between two pieces of plastic wrap and pound until very thin.

Lift off the top layer of plastic wrap and leave the steaks sitting on the bottom layer. Season each side of the steaks with salt and pepper to taste. Sprinkle enough flour over the top of the steaks to thoroughly coat; turn them over and repeat. Let the steaks rest for at least 20 minutes.

In the meantime, cook your potatoes, reserving the cooking water.

Heat a large saucepan or electric skillet to medium high. Add enough oil to coat the bottom of the pan plus about ¼ inch. Press the flour into each steak with the palm of your hand before adding to the hot skillet. Fry three or four at a time, being sure you don’t crowd them in the pan. Fry about 2 minutes on each side (when done they will have just a bit of red juices bubbling up through the flour coating), then transfer to a plate and keep warm in the oven. Continue until all the steaks have been quickly fried and are golden brown on the outside.

Turn the heat down to medium low. Pour off the oil in the skillet, all except 2 – 3 tablespoons. Take the flour that fell off the steaks when you were preparing them and add to the hot oil in the pan. You should have enough flour to make a thick paste with the oil; add more if necessary. Fry the flour in the oil for a couple minutes then slowly pour the reserved potato water into the pan, stirring constantly. Add salt and pepper to taste. Bring to a boil (this shouldn’t take long) and cook until thickened. Just before serving, thin the gravy with a bit of milk until it is of desired consistency.

Serve the steaks with mashed potatoes and pour the gravy over all.

Saturday, March 12, 2011

March 12, 2011: The Many Uses of Borax

Bookmark and Share

As I shared with you at the beginning of this month, borax (sodium tetraborate) is another staple to keep in your pantry for cleaning uses all over the house since it works really well as a detergent.

Most of us are familiar with the Twenty Mule Team brand of borax. I think about it every time I go visit my in-laws in California because we pass right by the mining operation in the state’s infamous Death Valley.

It’s interesting to note how the company got its name. The mine, a rich source of minerals, was first operational in the 1880s. The problem, however, was how to get the borax out of the valley and to the freight train that would distribute it around the country. The solution? Twenty teams of mules hitched to heavy-duty wagons which weighed over 18 tons each when loaded. These mule teams had to traverse 165 miles, starting at an elevation of 190 feet below sea level and ending at an elevation of 2,000 feet above sea level. Although it’s more romantic to think that horses were the biggest boon to taming the West, it’s actually mules that did the heavy lifting, making them much more valuable than a horse.

It’s strange to think that a mineral ore could be such a good cleanser, but it really is. I’ve already shared with you that it is a key ingredient in homemade laundry detergent, but it’s much more diverse than that. Plus, borax is safe for septic systems. It’s a natural ingredient, but it is toxic when taken internally; avoid contact with your eyes and wash your hands after using it.


Here are some additional uses for borax:

• Toilet cleaner – just sprinkle in the bowl of your toilet as you would powdered cleanser. For tough stains, swish it around and let it sit for an hour or overnight.
• Garbage disposals and sink drains – Sprinkle a couple tablespoons into the drain and let stand for a minimum of 15 minutes. Flush with warm water (turn the disposal on). It not only cleans, it freshens your drains.
• Even if you don’t use my recipe for homemade laundry soap, do add about a ½ cup of borax to your regular laundry detergent to make it work better.
• Carpet cleaner – use ½ cup of borax dissolved in about a cup and a half of warm water. Apply the mixture to carpet stains with a sponge or rag. Let it sit for half an hour then rinse with plain water. Vacuum after drying.
• Dishwasher – borax removes mineral stains. If you do not wish to use the following recipe for dishwashing powder, add a ¼ cup of borax to the bottom of your dishwasher to soften the water and reduce spots and film on your dishes.

Borax Dishwashing Powder

1 cup baking soda
1 cup borax
1 cup washing soda

Combine all ingredients and store in an airtight container. To use, add one tablespoon to each compartment of your dishwasher.

Tip: I have to be honest with you... While this recipe does a great job of cleaning your dishes, I found that over time it left a chalky white film on my dishes. I tried experimenting with the amounts of ingredients and adding vinegar to the rinse agent receptacle but nothing really solved this problem. I would only recommend using this formula once in a while (and that’s the reason I don’t use my dishwasher but once in a blue moon).

Friday, March 11, 2011

March 11, 2011: Meatloaf Recipe

Bookmark and Share

Ah, meatloaf… it’s one of the most popular comfort foods – unless your mom’s recipe wasn’t all too tasty. That’s the thing about meatloaf; it can either be really good or really bad. I tend to stick with my own recipe because I know I like it but never order meatloaf when I’m eating out in a restaurant.

These days not a whole lot of people make meatloaf, even though it used to be a mainstay for families in the 50s, 60s and 70s. The declining popularity is most likely due to the fact that it takes so long to cook; by the time a busy mom or dad gets home from work, there just isn’t enough time to prepare and bake a meatloaf.

It’s a shame, though, because leftover meatloaf makes THE best sandwiches the next day! When I used to work at a hotel in Mesa, a couple of my lunch buddies, who were much younger than me, used to beg me to make meatloaf and bring sandwiches for all of us the next day. Soft wheat bread, mayo, a bit of ketchup, and a sprinkle of salt and pepper and... yum! Of course, I didn't mind obliging them.

I think I’ve mentioned before that both my son and my husband are picky eaters. But there’s one thing that both of them agree on and that’s my meatloaf, which is a family favorite (and the older my son got, the less likely the chance that there would be any leftover for sandwiches the next day because he would finish it off for dinner).

Mama’s Meatloaf

2 slices bread, torn into small pieces
1 – 2 T. dried, minced onion (depending on your preference)
1 t. dried parsley
Milk (about ½ cup)
1 egg
¼ cup ketchup
Dash or two of Worcestershire sauce
2 t. Italian seasoning
Salt and pepper to taste
2 lbs. ground beef

In a large mixing bowl, combine the torn bread, onion, and parsley. Add enough milk to cover all the ingredients. Let sit for about 10 to 15 minutes. Add the egg, ketchup, Worcestershire, and seasonings and mix with a spoon. Add the ground beef, and mix with your hands until thoroughly combined.

Spray a loaf pan with nonstick cooking spray. Pat the ground beef mixture into the pan. Bake at 350 degrees for one hour to 1 ½ hours. After 45 minutes of baking, remove the loaf and pour off excess grease. Pour off the remainder of the grease again before slicing and serving.

Note: I know some people prefer a tomato sauce on top of their meatloaf but I'm not including a recipe for that here because my boys like ketchup better than anything else. For a quick sauce, use a can of condensed tomato soup.

Tips: You can use either 80% lean or 93% lean ground beef; the former makes a juicier, more tender meatloaf while the latter produces less grease – your call.
For the bread, I use the heal of a loaf since it’s not good for sandwiches. Then again, you can use any type of bread you have around. Last time I used one heal of wheat bread plus one cheddar garlic biscuit leftover from a previous meal. Cracker crumbs will also work if that’s all you’ve got handy.

Thursday, March 10, 2011

March 10, 2011: The Many Uses of Vinegar

Bookmark and Share

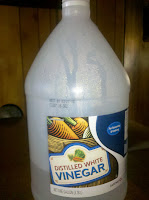
Plain, white vinegar is a wonderful cleaning product. It can do so many things around the house – it truly is a versatile product to always keep on hand. I buy it in the big gallon container and suggest you do, too. You might be surprised at how often you start using it once you know all the things it can do!

There are basically four ways vinegar is your household cleaning helper: as a deodorizer, as a mild bleach, as a remover of water mineral deposits, and as a dye setter.

Vinegar Deodorizer:
• Pour some into a small dish and place it next to the stove to absorb cooking odors.
• Dip your fingers into a bit of vinegar after chopping onion or garlic to remove the smell.

Vinegar Bleach:
• Mix with baking soda to form a paste and use to remove rust and water stains from sinks, countertops, etc.
• Line your damp bathtub with paper towels; pour vinegar over them. Let sit for an hour, then wipe away.
• Add a drop to your pet’s water bowl in the summer to keep it from forming algae.
• Spray full-strength on cutting boards used to slice raw meat.
• Add a bowl of vinegar to an empty washing machine or dishwasher during the wash cycle to clean the interior.

Vinegar Water Deposit Remover
• Run equal parts water and vinegar through your coffeemaker, tea pot, or water dispenser (once weekly is recommended).
• Pour full strength into a baggie. Place the full baggie over a shower head and secure it on the stem with rubber bands. Let sit overnight.
• Boil baby bottles in a mixture of equal parts vinegar and water.
• Pour into your steam iron’s water opening. Turn the iron to the steam cycle and let it sit upright for a few minutes, until the vents are unclogged.

Vinegar Dye Set:
• Presoak new, brightly colored clothing in a solution of vinegar, water, and a bit of salt to set the color and prevent bleeding.

Vinegar is also great for using in homemade glass cleaners and all purpose cleaning wipes. I’ll share those recipes with you later this month.